
Mastering Composition & Lighting Before Manual Mode
- Toni Ellen

- Sep 10, 2023
- 6 min read
Updated: Jun 10, 2025
So, you've just bought your new fancy camera? Congratulations! Now comes the fun part – taking photos. But all those buttons and settings can be super overwhelming if you've never used them before. I remember getting my first camera and every photo coming out blurry and yellow; I got really frustrated really quickly. There's also a much better way to get started than trying to figure out all the techy stuff, and other things to learn than just settings. Composition and lighting are two incredibly important things for any photographer to master to create those beautiful photos we all dream of.
The easiest way to learn these without getting bogged down by trying to nail the exposure as well, is by putting our cameras on auto so the camera will take care of the correct exposure, and allow us to play with composition and lighting without getting distracted.
✸ The Beauty of Auto Mode
Auto mode is your camera's 'point-and-shoot' setting. It automatically adjusts the camera's settings, such as aperture, shutter speed, and ISO, to capture a well-exposed image. We won't stay on auto forever as you probably bought a camera to take full advantage of manual mode and have control over your exposure, however it's a really valuable tool for beginners. Here's why:
Ease of Use: Auto mode allows you to concentrate on your subject and scene without worrying about technical details.
Quick Start: It's the quickest way to start taking pictures and see immediate results.
Learning Curve: It provides a gentle introduction to photography, allowing you to gradually build your skills.
✸ Mastering Lighting in Photography
Lighting is the essence of photography. Learning to observe and manipulate light can transform ordinary scenes into extraordinary photographs. Here are some lighting fundamentals to experiment with:
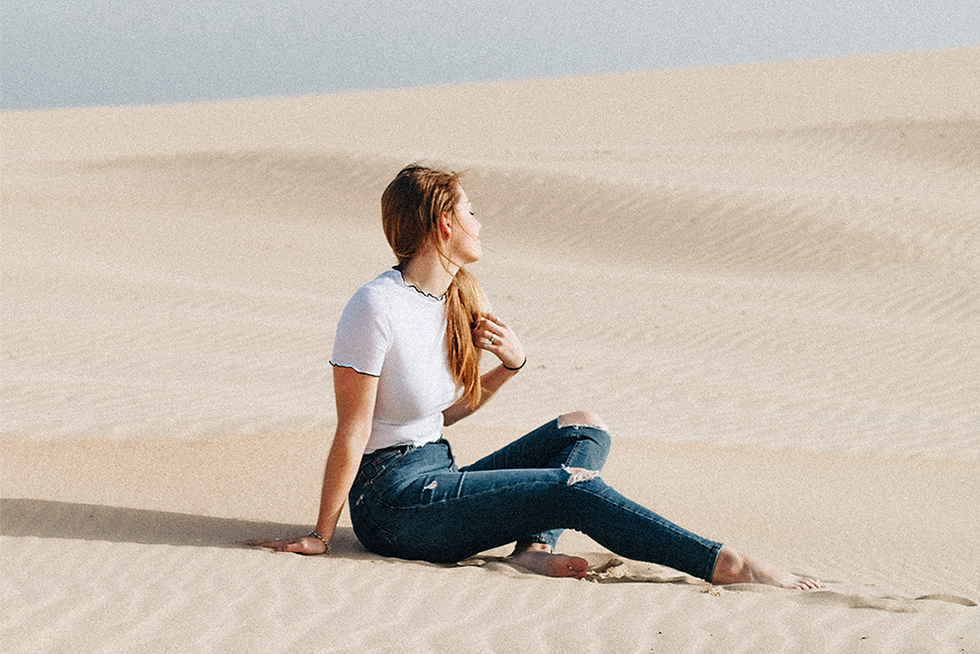
Golden Hour in photography refers to the magical time around an hour after sunrise and an hour before sunset when the sunlight is soft, warm, and diffused. During this time, the sun is low on the horizon, and its light has to pass through more of the Earth's atmosphere, scattering the harsher blue and green wavelengths and allowing the warmer reds, oranges, and yellows to dominate the scene. The result is a beautifully soft and flattering quality of light that adds depth, warmth, and a captivating glow to photographs. Photographers often cherish the golden hour for its ability to enhance the mood and ambiance of their shots, making it a preferred time for capturing landscapes, portraits, and many other subjects in the most enchanting and evocative light.

Harsh Light in photography occurs when strong, direct light creates sharp, high-contrast shadows and highlights, typically during midday. While it can be challenging, this lighting situation offers opportunities for dramatic and dynamic images. Photographers often use harsh lighting creatively, embracing the stark contrast and shadows to add impact and visual interest to their subjects, whether capturing the texture of a rugged landscape or creating bold, expressive portraits. If your light is harsh, you also have the opportunity to play with shadows which can be really fun and creative. This is a really tricky time of day to take photos, but often as photographers we won't have control over the time of day we are required to shoot, so it's really important to practice in harsh lighting and understand how to work with it, not against it.
Indoor Lighting refers to the light within indoor spaces, which can be provided by artificial sources like lamps and overhead lights or natural light entering through windows and doors. Understanding and effectively using indoor lighting is essential for photographers, as it greatly influences the atmosphere and quality of indoor photographs. Different types of indoor lighting, such as warm incandescent or cool fluorescent, can cast various color temperatures on your subjects, impacting the overall feel of your images. Photographers often manipulate indoor lighting through techniques like bouncing light off walls or ceilings or using diffusers to soften harsh shadows, ensuring they capture the desired mood and ambiance in their shots.

Backlighting is a technique where the primary light source is positioned behind the subject, creating a beautiful effect. This approach often results in the subject appearing as a silhouette against the bright background, adding a sense of drama and mystery to the image. Backlighting can also create a beautiful halo or rim of light around the subject, enhancing its shape and separating it from the background. While it can be challenging to manage exposure and prevent lens flare when using backlighting, mastering this technique can lead to captivating and visually dynamic photographs.

✸ The Art of Composition in Photography
Composition is the backbone of captivating photography. It involves arranging elements within your frame to create visually appealing and meaningful images. Here are some essential composition techniques to explore:
The Rule of Thirds is a fundamental composition guideline in photography and visual arts. It involves dividing the frame into a grid of nine equal sections, created by two equally spaced horizontal lines intersecting with two equally spaced vertical lines. By placing key elements of interest along these gridlines or at their intersections, photographers can achieve a balanced and visually pleasing composition. This technique draws the viewer's eye into the image, creating a sense of harmony and depth. The Rule of Thirds is a versatile tool that can be applied to various genres of photography, from landscapes to portraits, and it encourages photographers to think critically about how they arrange elements within the frame to create compelling and well-balanced images. Most cameras will even have a setting to show a Rule of Thirds grid on the screen so you can practice placing your subject at these key points.

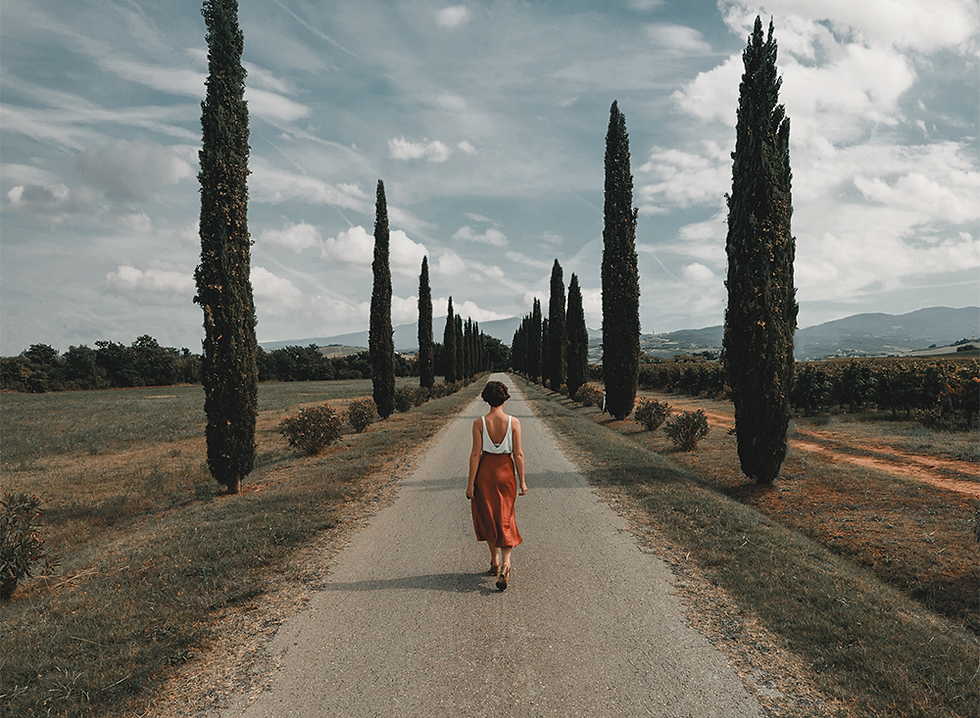
Leading Lines are a powerful compositional element in photography, drawing the viewer's gaze into the image by using lines within the frame to guide the eye toward a specific focal point or subject. These lines can be anything from roads and pathways to natural elements like rivers or tree branches. Leading lines not only create a sense of depth and perspective but also add a dynamic and engaging quality to photographs. By strategically placing and utilizing leading lines, photographers can enhance the visual storytelling in their images, directing attention to what matters most and creating a more immersive viewing experience for the audience. Leading lines will generally come in from one edge or corner of the frame, and lead up to your subject.
Framing is where the photographer uses elements within the scene to frame the main subject. These elements, such as doorways, windows, arches, or even natural objects like tree branches, act as a visual border around the subject, drawing attention to it and adding depth to the composition. Framing can evoke a sense of context or enclosure, providing viewers with a unique perspective and a clear focal point within the photograph. It not only enhances the subject's importance but also adds layers of storytelling and visual interest to the image. You can use framing as a tool to add depth, narrative, and visual intrigue to their compositions, creating more engaging and memorable photographs.

Balance in photography refers to the distribution of visual elements within the frame to create a sense of equilibrium and harmony. Achieving balance can be done in various ways, such as ensuring that the visual weight of objects on one side of the image is countered by elements on the other side. It's about finding the right equilibrium between contrasting elements like light and dark, large and small, or colorful and neutral. Whether it's symmetrical balance, where elements are mirrored on both sides of the frame, or asymmetrical balance, where different elements are carefully positioned to create equilibrium, a well-balanced photograph is pleasing to the eye and often conveys a sense of stability and order within the composition.

✸ Play & Practice
Now that you've embraced auto mode, composition, and lighting, it's time to play and practice. Here's how to make the most of this creative phase:
Research: A great way to practice as a beginner, is to find photos that you like and attempt to replicate the lighting and composition in the image.
Explore: Venture to different locations, experiment with various subjects, and take pictures of anything that catches your eye.
Focus: There are so many other settings you can play with on your camera while still in auto, and a really important one is your focus. There are a bunch of different focus settings you can use for different situations, have a look at them here.
Review and Learn: After each session, review your photos on a computer or larger screen to identify what worked and what didn't. How did you go compared to the images you researched and tried to replicate?
Experiment: Don't hesitate to try unconventional angles, perspectives, or styles. Push your creative boundaries and have fun!
As a beginner photographer, the path to mastery begins with simplicity. Starting with auto mode allows you to develop your eye for composition and lighting without the overwhelm of technical settings. Photography is a blend of art and science, and while you'll eventually dive into the technical aspects, there's no rush. Enjoy the journey, savor the learning process, and let your creativity flow. With practice and patience, you'll find that as you become more confident with composition and lighting, you'll naturally gravitate towards exploring your camera's manual settings, unlocking even greater photographic potential.
So, grab your camera, set it to auto mode, and let the adventure begin. Happy shooting! ✨


Comments